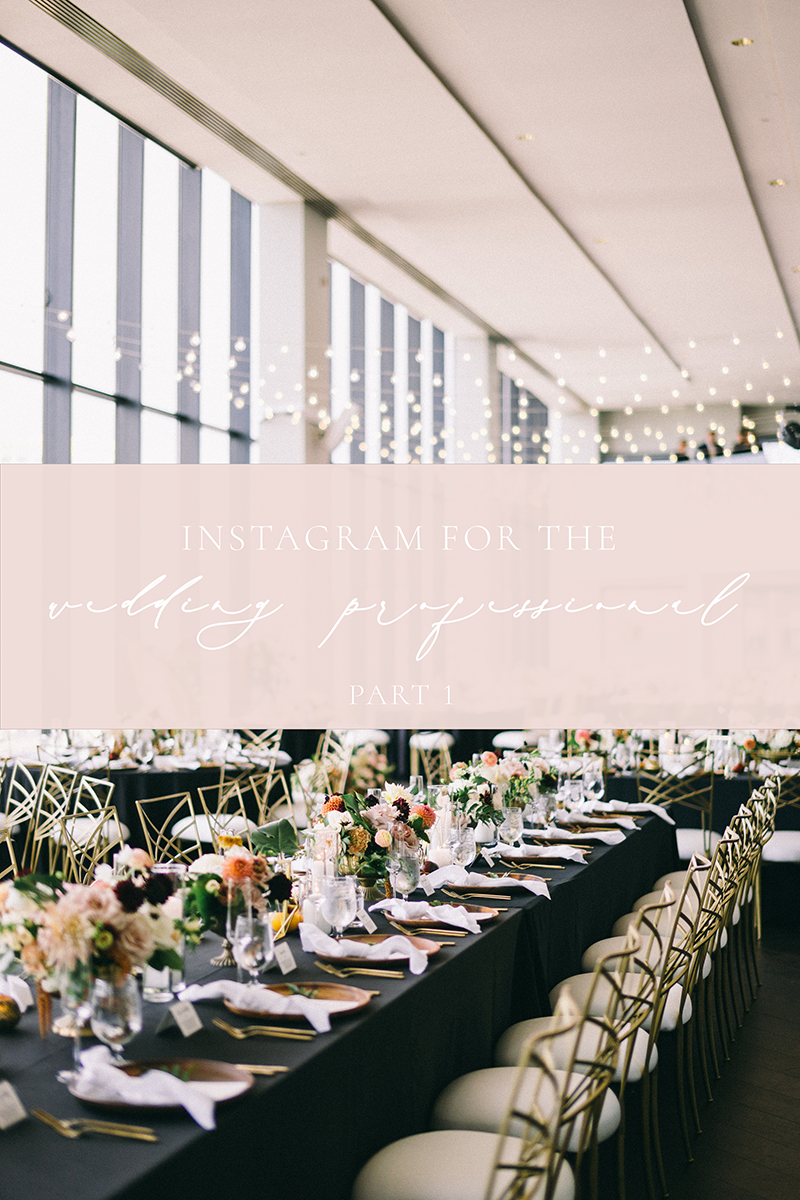
 Instagram for the Wedding Professional
You may have watched the Instagram LIVE I hosted last week with Keri from Always Yours Events all about Instagram for the wedding professional. We chatted about how to curate your feed, how to create content, how being in the wedding industry means you’ll use Instagram a little bit differently, etc. We noted at the end of the LIVE that we would be creating a blog post for you all to really break down the different tips and how exactly we create our content and get it ready for Instagram. Below you can find the audio on our talk along with the content in video form (part 1 and part 2). Let me know if you have any questions!
CURATING A COHESIVE INSTAGRAM FEED {FOR WEDDING + EVENT PROS}
Who is exhausted by Instagram sometimes? Raise those hands, because we know we aren’t the only ones!
Jaimee and Keri here! We are so glad you decided to join us here on this blog post to continue our Instagram conversation! Last week on Friday we hosted an Instagram Live video for wedding and event industry pros, and we were overwhelmed by the incredibly positive response! Because the LIVE session was jam packed with takeaways and helpful content, we wanted to follow up with a blog post covering one topic that you all seemed the most passionate about: how we curate our Instagram feeds.
If you haven’t watched the IG Live, head to the links below to access the recording of it on Jaimee’s IG account and watch with this blog post to reference as you watch! Part 1 and Part 2 can be accessed here on Youtube! In our LIVE we chat about the unique challenge the wedding and event industry faces on Instagram, how to focus on growing a “targeted” following over a broad following, the focus on conversion rate over follower count, how we strategize to grow our following by speaking directly to our ideal clients and our favorite tips and tricks for curating our feed and interacting with Instastories. There is SO much great content in there that you don’t want to miss, but, if you prefer to learn how we manage to curate our Instagram feeds and all of our favorite tips and tricks, continue reading below.
Let’s dive right in.
JAIMEE AND KERI’S APPROACH TO CURATING A COHESIVE INSTAGRAM FEED:
Define Your Color Palette: Choose a color palette that works for your business and brand. Try to narrow down about 3-5 colors that you most often use within your brand, your aesthetic, find in your home and your surroundings.
- Jaimee: My common color palette is a lot of whites, neutrals, greens, and blues. However, the color for my feed changes throughout the year. Different seasons and different locations bring on very different colors for me. The greens from the lush forests of Maine are much different from the pale greens from Arizona cacti. But the way I mesh them is by keeping the color palette the same for 9 squares and then putting in a black and white photo to switch it over. Keri: My feed is light and airy with a focus on white, blush, nudes, pale soft blue, cement gray and green. These colors are my brand colors and some of the shades (such as whites, nudes, cement gray and green) are universally utilized shades throughout my wedding designs. My goal is to feature all of these colors EVENLY in every series of 9 photos on my Instagram feed. I focus on 9 photos at a time because typically current followers and potential followers look at your IG feed viewing 9 photos at a time.
Download a Instagram content planning app such as Planoly or Plann: Keri uses Planoly, Jaimee uses Plann. Both work perfectly. The idea behind using these apps is to allow you the ability to play around with photos before sharing them. Think of your Instagram feed in Planoly or Plann as a “contact sheet.” If you are a photographer, you likely have played around with contact sheets before, but for those pros who haven’t here are 2 sample contact sheets for this purpose below. The contact sheets below each have feature a collection of 9 photos. Can you spot the contact sheet that is the most visually pleasing to the eye due to color flow, content flow and consistency?
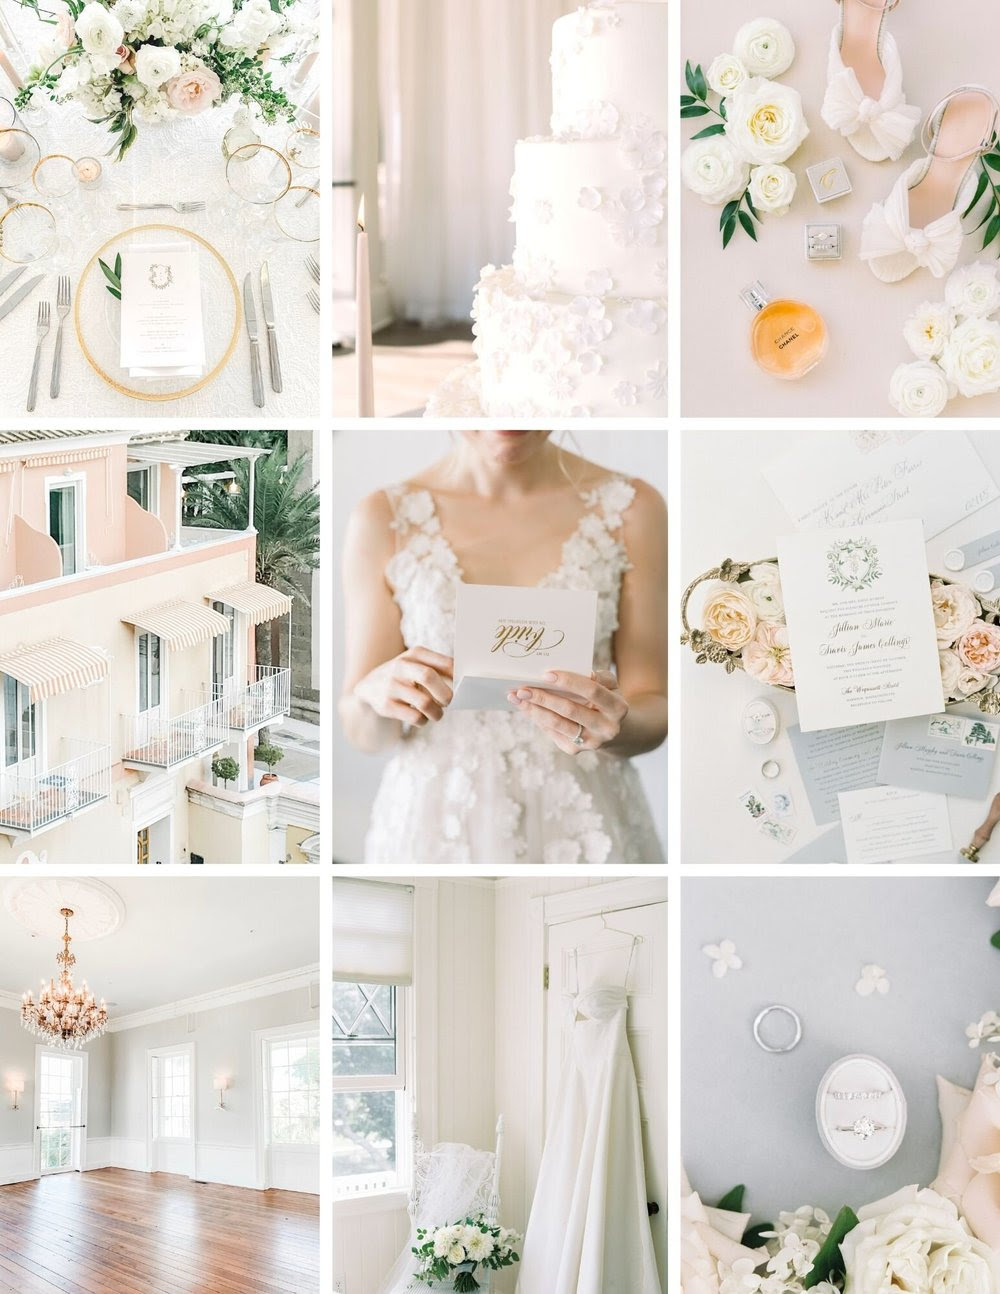
CONTACT SHEET ONE

CONTACT SHEET TWO
Correct, it’s Contact Sheet One. Notice how on Contact Sheet One the colors flow together beautifully and are spaced out evenly, the content is all consistently light and airy, and the subjects of the photos are well positioned? These are the types of feeds that clients and potential followers will gravitate towards — they will not only likely feel compelled to follow, but if in need of purchasing your service or product, they will be impressed enough to potentially to convert into true profitable clients.
The process of playing around with your photos in Planoly or Plann is a crucial step. It’s like a puzzle — you keep testing out all of the pieces until you get the perfect fit. Try to set aside one day every 2-4 weeks to organize and curate 2-4 weeks worth of Instagram content for your feed to ensure it’s cohesion and reduce your stress of posting on the spot!
Tip: For posts that you REALLY want to share but do not work in your feed naturally, upload them into your stories. OR create a gallery post with cover photo that looks beautifully and cohesively in your feed, and ask your followers to swipe to see the reveal of one of your “favorite photos” — this is a great way to garner more engagement through intrigue as well.
Organize Your Photos to Make Curating Your Feed Easier: One thing that both of us do is collect photos into folders that allow us to easily retrieve photos from. For every wedding, engagement session, editorial, collaboration, styling session, branding, workshop and headshot gallery you obtain, create a folder of all photos in the gallery that fit your feed’s aesthetic and color palette. Then also create a folder called “High Engagement Photos” of the top 20-30 photos on your Instagram that have performed and engaged well on your Instagram in the past (you can see these photos in your “Insights” in your business analytics on your Instagram account). Keep this folder updated. Download these folders to your phone or to Dropbox and keep the Dropbox app on your phone. You can also upload all of these photos directly into Planoly or Plann as well.
Edit Your Own Phone Photos with Presets that Match Your Aesthetic: Keri here — if you don’t have presets on your phone yet, get on it! Presets are essentially a family of filters that when applied take get your photos to look 80-90% perfect for your feed, and then you simply tweak the photo slightly further to make it perfect. My favorite app for editing on my phone is Lightroom. Download Lightroom and to get started. Then, do a little research to find some presets that work well with your aesthetic. My favorites are Veil Presets, Lauren Fair’s Presets, Carly Michelle Photography’s Presets and Goodlight Presets. Purchase and download your presets to Lightroom and begin finding the presets that will be your “go to” presets when taking your own photos. Disclaimer: Do NOT use presets on professional photos taken by a photographer — this is a big “no no” in the wedding and event industry as you are altering a photographer’s artistic work.
Batch Organize Your Posts in Advance: Since you are focusing on curating 9 photos at a time, try to batch organize and schedule your posts at least 2 weeks in advance — or better yet 4 weeks if you can! We try to plan around 18 photos in advance on Planoly by pulling from my gallery folders and photos we take of my lifestyle in real time, and then we fill in where needed with photos from my High Engagement folder. It can be challenging during the off season when you don’t have wedding photos and new content to share and get excited about, which is why it’s really nice to have those folders we previously talked about at the ready! Overall batching and scheduling your posts in advance like this will give you plenty of time to organize your photos in Planoly or Plann and ensure your feed looks like a work of art at all times. This also takes so much stress out of the posting process!
Create Your Captions: We could devote an entire blog post to this topic so we will keep it simple here. You want to ENGAGE in 75% of your captions. It’s okay if you need to pull out a quote or share a little thought or quip for 25% of your photos. But for the majority you want to engage, start a conversation, inspire or at least be thought provoking. One of my favorite ways to engage is to tell a deeper story behind a wedding photo — for example, rather than just showing the flower filled escort card wall for a wedding, I will go into detail about how we created the wall and why we chose the design we did for the client. I might even through in some funny bloopers about the escort card wall to keep the post interesting. If you are stuck on a caption, scroll through this list to get the creativity flowing:
- Quote about love/brides/flowers/anything wedding
- Quote about strong girls, independent girls, etc
- Explanation about a moment at a wedding- I did this recently with a dancing photo of a bride. You can see that here (and spoiler: it got great interaction!)
- Interesting Facts about yourself
- Holidays, National Day of ____, or Special event that is happening
- Explanation about a product or service that you offer
- Highlights of your weekend
- What part of your process looks like
- Highlights of the wedding day
- Spotlight on one of your favorite wedding vendors
- Client Reviews
- BTS Information // ie- “today we went shopping for new ribbon to tie up your bouquet perfectly and add in that extra flair of movement when the wind catches it”
Or “doing a mock up for our June bride getting married with sensational taste. Minimalist design with pops of bright colors”
- Explanation of your couple (I usually keep a log of info on each couple after each conversation we have. I’ll write down things that they mentioned a lot, things that were important to them, etc). “They explained to me that this was the only day they would have every one of their closest friends and family under one roof and that’s why this day meant so much to them.”
- Introduction of yourself and your business (you should be getting new followers every week and they might not have a real grip on who you are)
- Giveaway/Contest
- Mistake/Blooper from a wedding that will make everyone giggle
Post, Hashtag and Engage: Post those beautiful photos, add your list of hashtags that work for your ideal client (watch our Instagram Live for more on this subject), and engage with followers in the comments.
Keep Your Folders Updated: Keep updating those folders of photos that work for your feed. This includes putting your new presets on your photos that you have recently taken that can be used later. This is the maintenance step that will promote cohesion and help you maintain that perfect feed.
Ready to take on your Instagram with your new app, presets and folders at the ready? Good, because we can’t wait to see what you do with your feeds! Comment below with any questions and be sure to keep us posted on here or in our DMs on your progress!
Looking for even more specific content strategy, growth strategy and a specific plan made for your own Instagram and business? The AYE Instagram Mentorship Session might be a great fit for you! Email [email protected] to learn more — also, a little birdie told me there are just 2 spots left for Spring 2020 Mentorships!
Xoxo, Keri and Jaimee
affiliate links included